· Piotr · tutorials · 2 min read
How to Use One Button to Change Two Different Filters in Coda
Short guide how to set 2 (or more) different filters with 1 button
Introduction
Coda is a powerful tool for creating documents that bring data, text, and collaboration in one place. One of the most useful features of Coda is the ability to filter data based on certain criteria. In this article, we will show you how to use one button to change two different filters in Coda.
Setting Up the Filter Settings Table
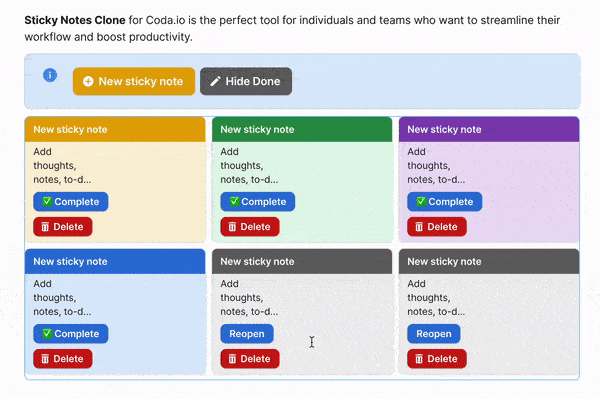
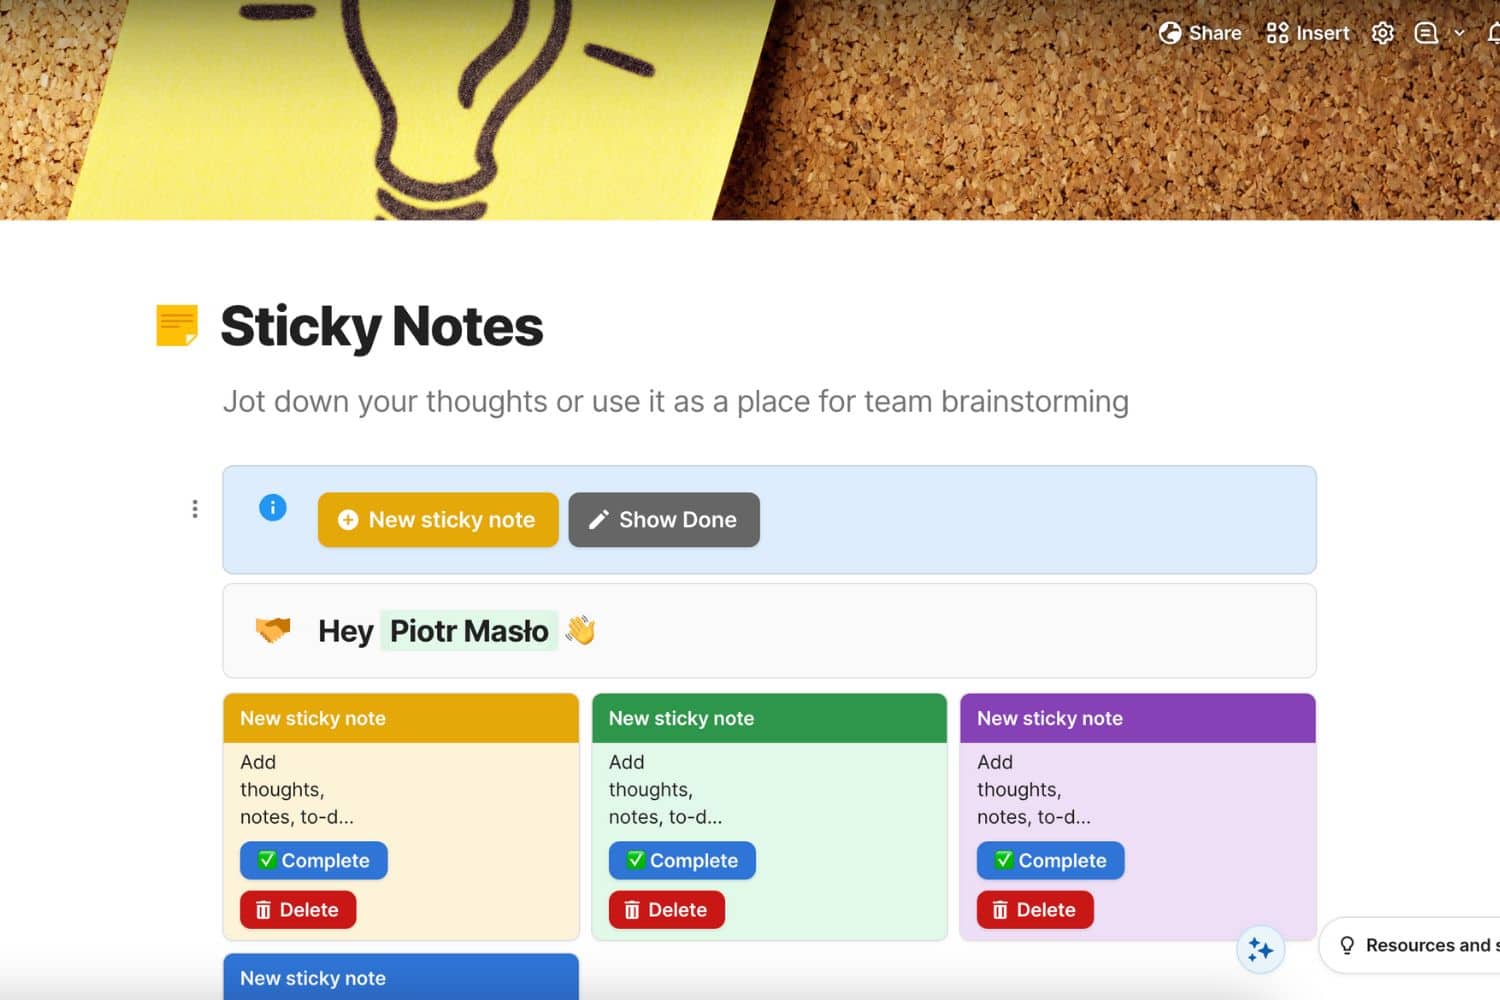
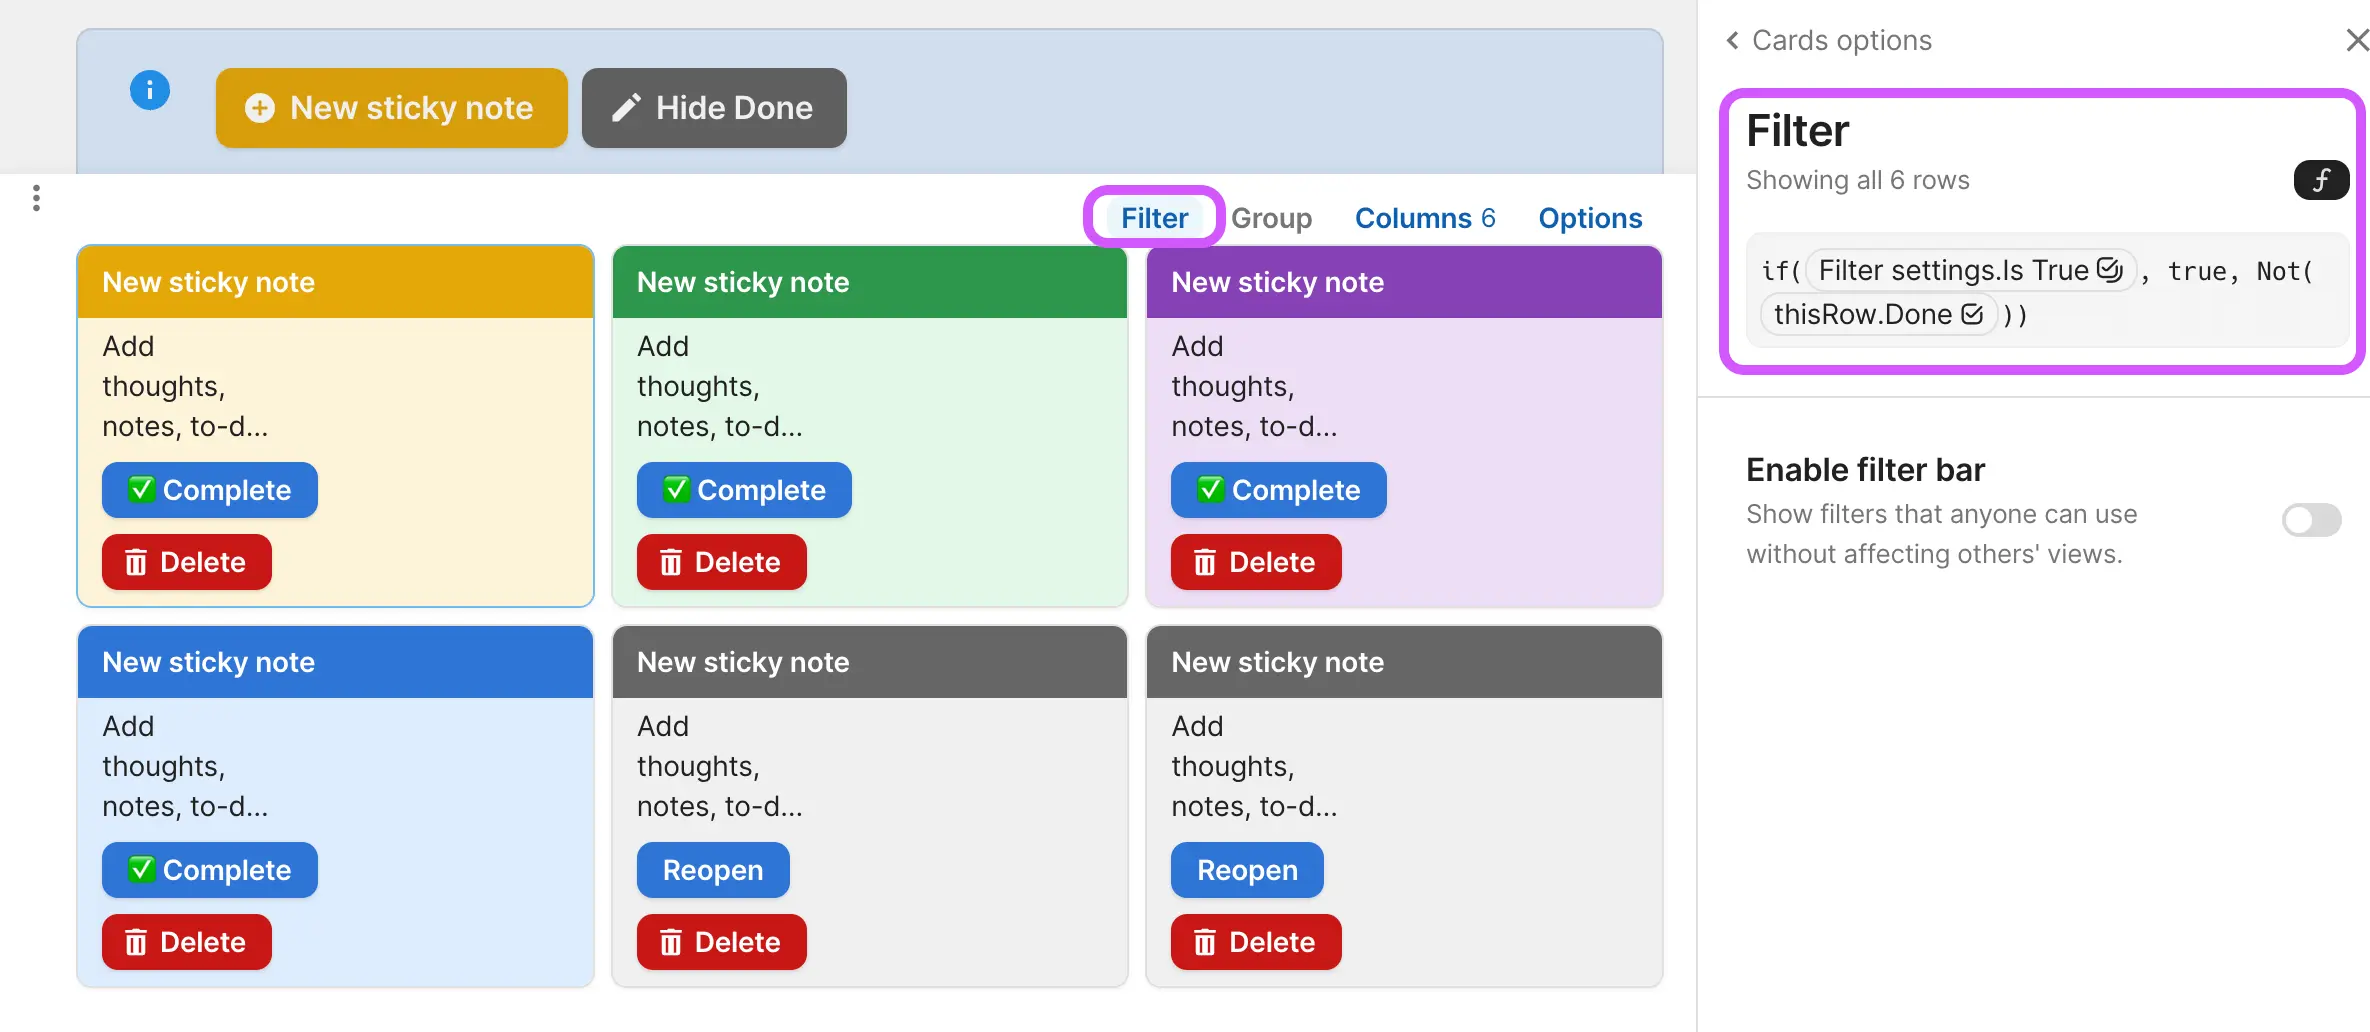
To achieve this, we will first set up a new table called “Filter settings” with two columns: “Setting” and “Is true?“. In the “Setting” column, we will input the name of our setting, for example, “Show done?“. In the “Is true?” column, we will set the box to false. 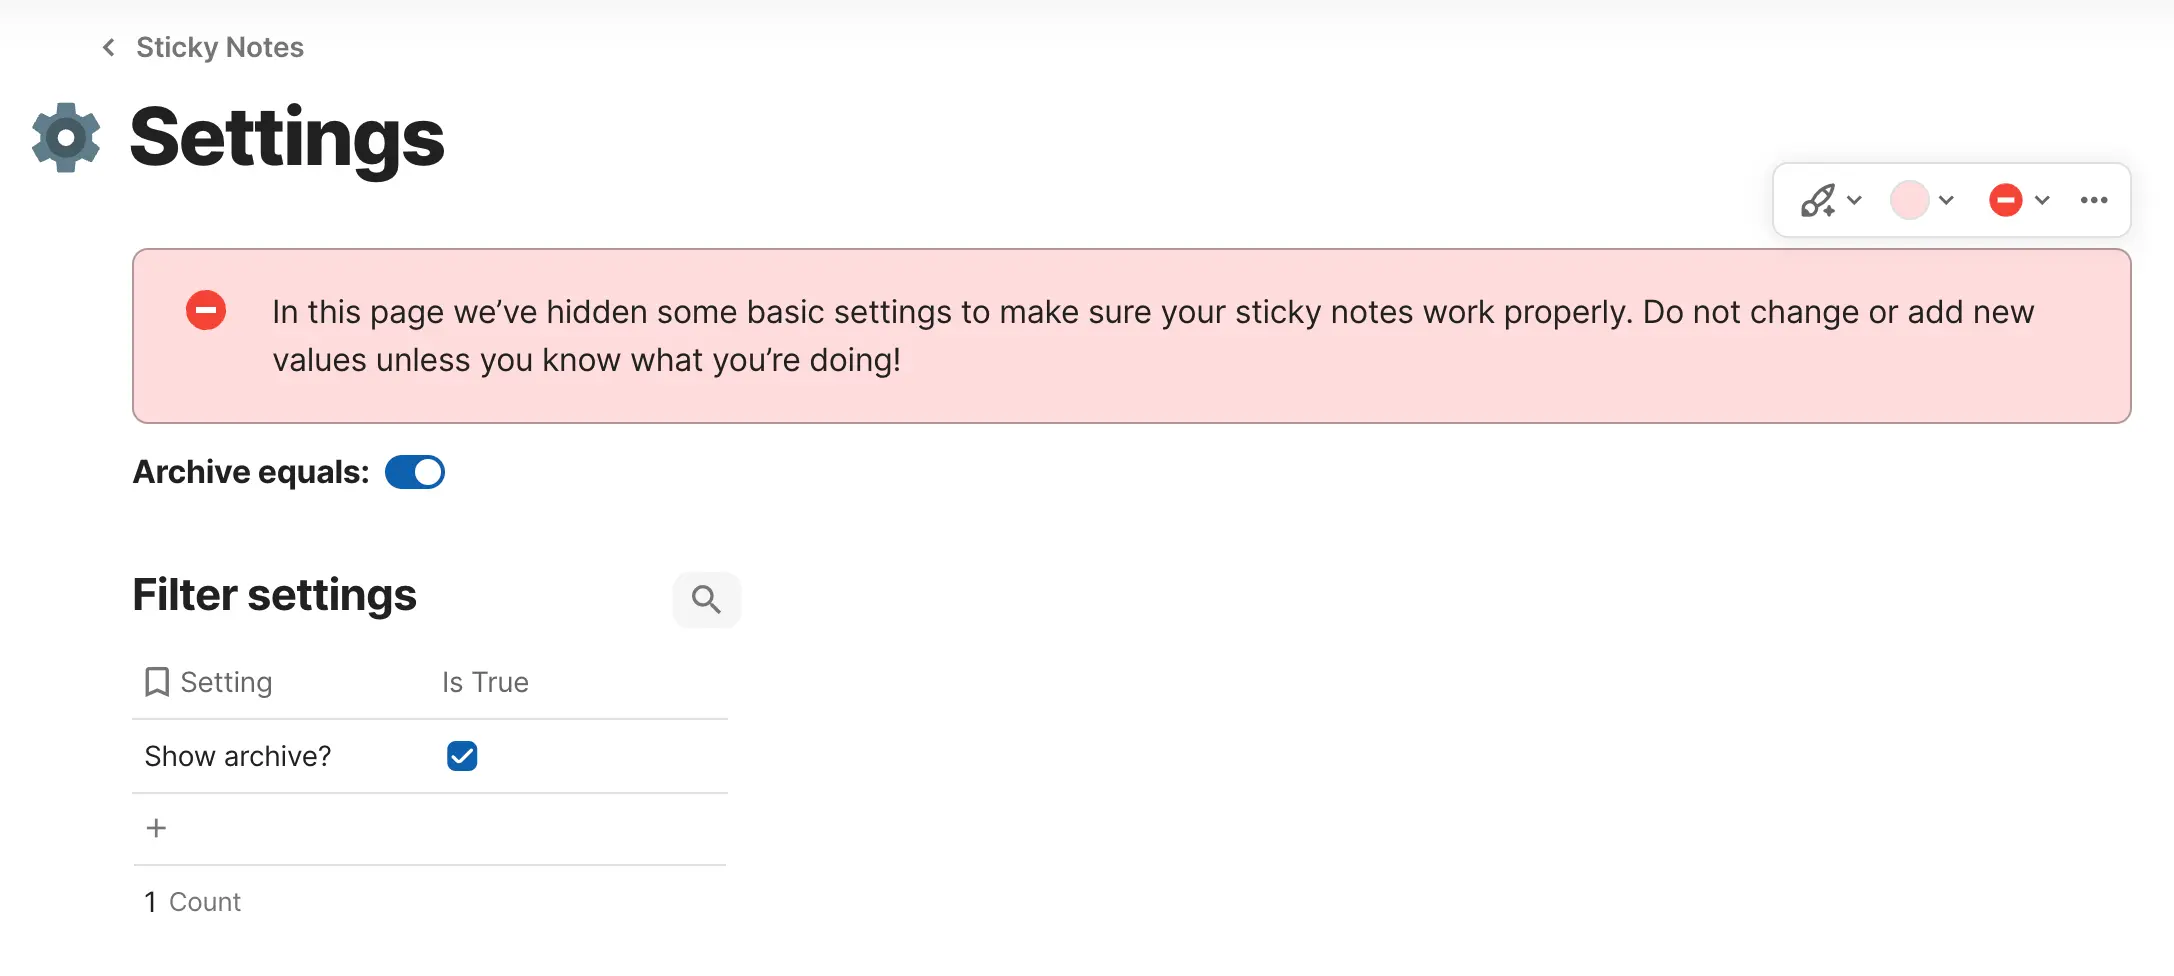
Adding Filters to the Table
Next, we will add filters to the table we want to filter. We will use the following filter:
if([Filter settings].[Is True], true, Not(thisRow.Done))Here, “Filter settings” is the name of our table with settings, and “Not(thisRow.Done)” is our hidden column in the table we want to filter.
Setting Up the Button
Now, we will set up our button. We will add a new button and give it a “modify rows” action. We will set “Apply to” to “custom filter” and click on the function button to add the following formula:
Filter settings="Show archive?"This formula will tell Coda which filter to apply when the button is clicked.
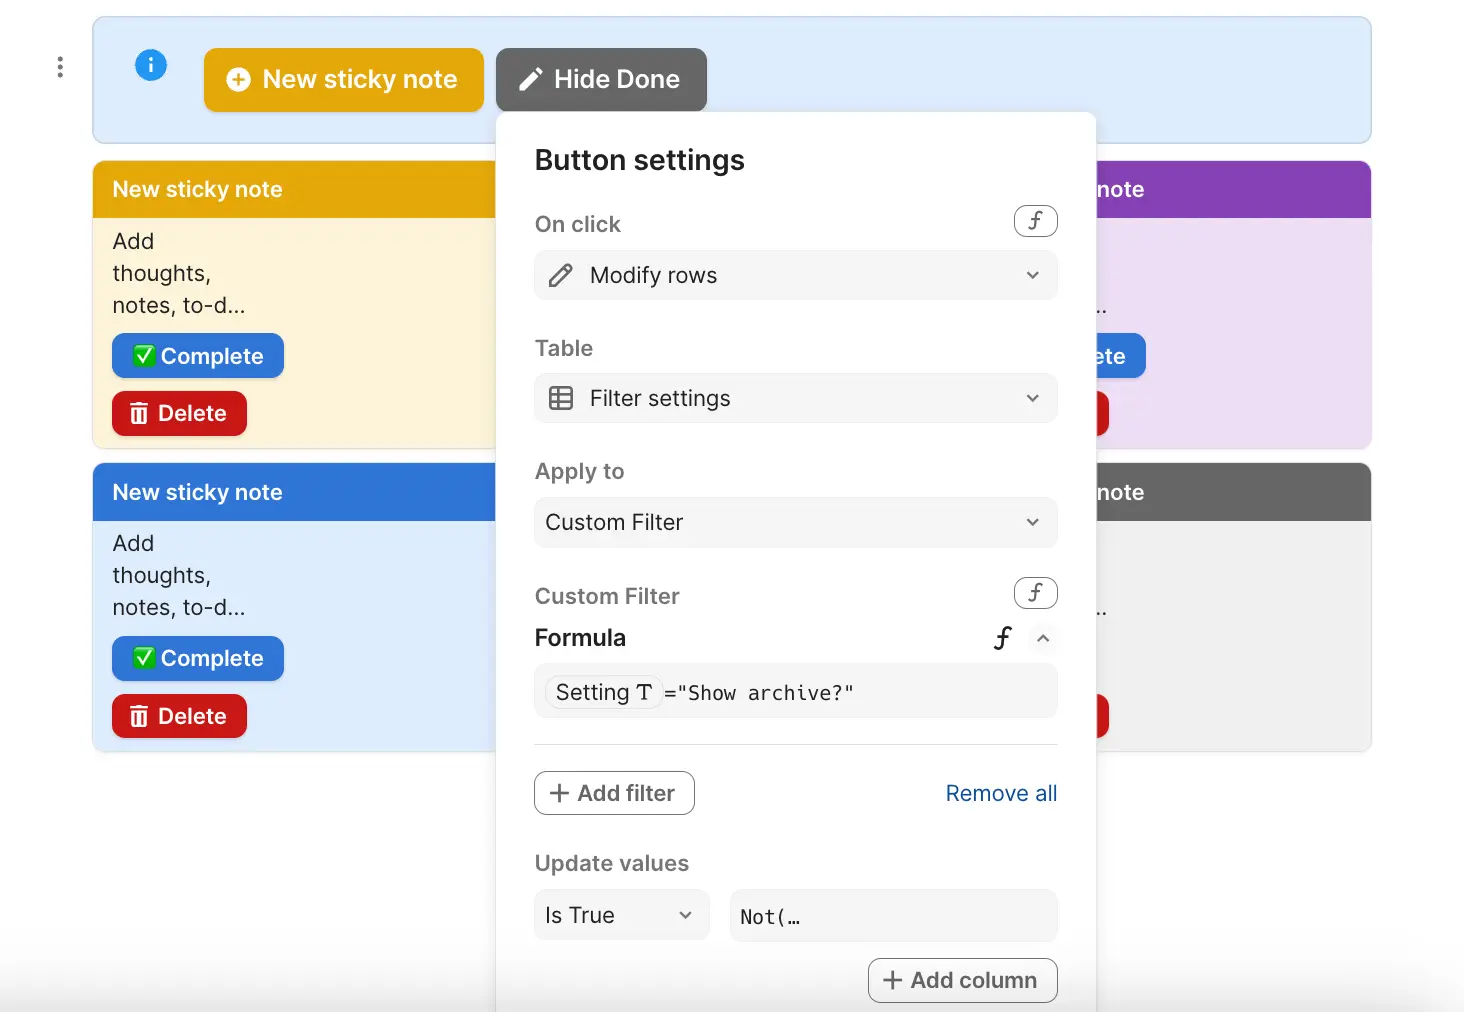
Finally, we will set “Update values” to:
"Not([Filter settings].[Is True])"This will toggle the value of the “Is true?” column in our “Filter settings” table every time the button is clicked.
Bonus: Changing the Button Label
If you want the button to show a different title based on the filter being applied, we can set the following formula in the “label” box:
If([Filter settings].[Is True]=True, 'Hide Done', 'Show Done')This will change the label of the button to “Hide Done” when the filter is applied, and “Show Done” when it is not.
Conclusion
Using one button to change two different filters in Coda is a simple and effective way to streamline your workflow. By setting up a “Filter settings” table and using the “modify rows” action, we can easily toggle between different filters with just one click. Additionally, by using the “label” formula, we can make our button more user-friendly by changing its title based on the filter being applied.
You can get a copy of Sticky Notes Clone here.